Apache Tomcat is one of the open source web server to test web applications. Continue reading this article to know download and installation of the tomcat server in windows environment. Also, I have explained how to change the port number of tomcat from by default 8080 to another number.
Download:
First, we need to download the latest version of the Tomcat web server installable file as .exe file by using these link Tomcat 6.0 to download.
Installation:
Tomcat web server executable file download has been completed, we will run(double click) .exe file to install tomcat web server. When we started running the Tomcat web server that will show the below page, It means the started installation process.
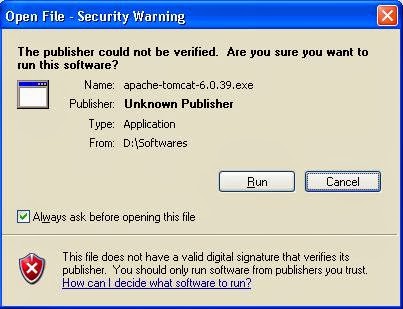
Once we will get the above screen, we need to press the 'Run' to go further installation of the Tomcat web server. When we started running the Tomcat server installation we will get the below screen in the process of tomcat installation.

In the above image we need to click on 'Next' button to proceed further installation of tomcat web server.

When we will get the above screen, there we need to accept the tomcat web server agreement by clicking on 'I Agree' button. This is also helps us to proceed further installation of tomcat . We should accept the agreement to install Apache tomcat by clicking on 'I Agree' button, then we will get the below UI on the screen.

The above choose components will gives you few of optional components to select. But, first one Tomcat is mandatory field to install. Once the selection has been completed just click on 'Next' button to move farther, you may get like below UI on the screen.

In the previous screen which is showing is the important step in tomcat installation process. Here, if we want to change the 'port numbers', 'username' and 'password'. These three fields are user defined fields which will helps at the tomcat login process. If you have already installed any of the other servers in your PC. Here, you can change port numbers, username and password. These values are not match with existing server information. Once you have entered all the information, click on 'Next' button proceed.

In the above screen we will come to know the directory path of the JRE where we were already installed in our machine. That will automatically display's when java exist's in your PC. Otherwise that will ask you to browse the JRE folder. Once your setting the JRE , just click on 'Next' button for further installation.

In the above screen we will see the installation directory of the tomcat server. If we need to change into another directory we can browse the directory path by clicking on browse button. T he above one is asking you where to install Apache Tomcat. By default that will show you above path user 'Program Files'. You just click on 'Install' button to install Tomcat into your machine. When your clicking on Install button that may show below image.

You just click on 'Ok' to install Apache Tomcat.
 In the above one is showing like Apache Tomcat Installation progress. Once installation will be completed, you will get the below image on your screen. You just click 'Finish' button on to finish installation and 'Run Apache Tomcat'.

Congratulations .........Your successfully completed Apache Tomcat Installation.
Download:
First, we need to download the latest version of the Tomcat web server installable file as .exe file by using these link Tomcat 6.0 to download.
Installation:
Tomcat web server executable file download has been completed, we will run(double click) .exe file to install tomcat web server. When we started running the Tomcat web server that will show the below page, It means the started installation process.
Once we will get the above screen, we need to press the 'Run' to go further installation of the Tomcat web server. When we started running the Tomcat server installation we will get the below screen in the process of tomcat installation.
In the above image we need to click on 'Next' button to proceed further installation of tomcat web server.
When we will get the above screen, there we need to accept the tomcat web server agreement by clicking on 'I Agree' button. This is also helps us to proceed further installation of tomcat . We should accept the agreement to install Apache tomcat by clicking on 'I Agree' button, then we will get the below UI on the screen.
The above choose components will gives you few of optional components to select. But, first one Tomcat is mandatory field to install. Once the selection has been completed just click on 'Next' button to move farther, you may get like below UI on the screen.
In the previous screen which is showing is the important step in tomcat installation process. Here, if we want to change the 'port numbers', 'username' and 'password'. These three fields are user defined fields which will helps at the tomcat login process. If you have already installed any of the other servers in your PC. Here, you can change port numbers, username and password. These values are not match with existing server information. Once you have entered all the information, click on 'Next' button proceed.
In the above screen we will come to know the directory path of the JRE where we were already installed in our machine. That will automatically display's when java exist's in your PC. Otherwise that will ask you to browse the JRE folder. Once your setting the JRE , just click on 'Next' button for further installation.
In the above screen we will see the installation directory of the tomcat server. If we need to change into another directory we can browse the directory path by clicking on browse button. T he above one is asking you where to install Apache Tomcat. By default that will show you above path user 'Program Files'. You just click on 'Install' button to install Tomcat into your machine. When your clicking on Install button that may show below image.
You just click on 'Ok' to install Apache Tomcat.
Change the Tomact Port Number:
Follow these steps to change Tomcat port number from installed directory.
- Go into Tomact installation directory and open 'conf' directory to edit 'Server.xml' file.
- Find following similar statement in Server.xml file.
- By default Tomcat Port number will be "8080". Replace this number with your own number. The below statement instruct Tomact runs on port "8181".
- Save Server.xml and restart Tomcat server. Done.
<Connector port="8080" maxHttpHeaderSize="8192"
               maxThreads="150" minSpareThreads="25" maxSpareThreads="75"
               enableLookups="false" redirectPort="8443" acceptCount="100"
               connectionTimeout="20000" disableUploadTimeout="true" />
<Connector port="8181" protocol="HTTP/1.1"
               connectionTimeout="20000"
               redirectPort="8443" />
Comments
Post a Comment